
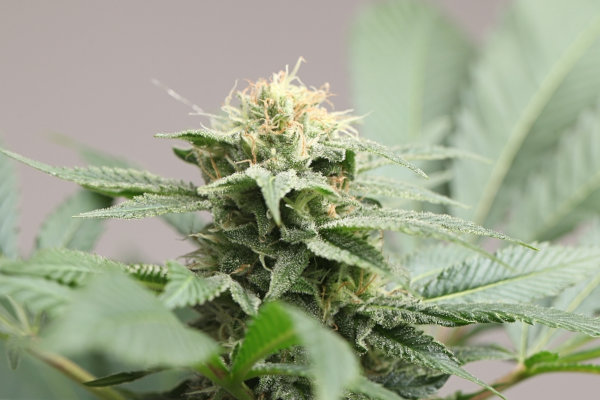
If there’s one phase in cannabis cultivation that separates average results from exceptional ones, it’s the flowering stage. After weeks of careful care during the vegetative stage, your plants finally shift their energy toward what truly matters: bud production.
At this stage, small environmental mistakes can have big consequences, and informed decisions can dramatically improve quality and yield.
Understanding the cannabis flowering stage means knowing what to expect week by week, how to fine-tune conditions, and how to avoid common pitfalls before they impact your harvest. With the right knowledge and stable genetics, you’re not just hoping for great results; you’re actively building them.
What Is the Cannabis Flowering Stage?
The cannabis flowering stage is the final and most rewarding phase in your plant’s life cycle, whether you started with feminized seeds, hybrid seeds, or autoflowering seeds. After the delicate seedling stage and the structure-building period of vegetative growth, your plant shifts its energy toward producing flowers, better known as buds.
During the vegetative stage, your cannabis plant focuses on leaves, stems, and overall size. But once flowering begins, growth patterns change. Instead of building more foliage, the plant prioritizes bud development, resin production, and terpene expression.
For those growing cannabis indoors, this transition is usually triggered by adjusting the light cycle. Photoperiod cannabis plants begin flowering when they receive roughly 12 hours of light and 12 hours of uninterrupted darkness, signaling that it’s time to reproduce.
This stage demands precision. Environmental stability, proper nutrients, and strong genetics all influence how well your buds develop. Simply put: flowering is where preparation meets payoff.
How Long Does the Flowering Stage Last?
The length of the marijuana flowering stage depends primarily on genetics. Generally speaking:
- Indica-dominant strains: 6–8 weeks
- Hybrid strains: 8–10 weeks
- Sativa-dominant strains: 10–12+ weeks
Autoflowers typically complete their entire life cycle (including flowering) in about 8–12 weeks from seed. While these timelines offer guidance, visible signs like pistil changes and trichome development matter more than the calendar. Harvest too early and you sacrifice potency; wait too long and effects may shift.
Flowering may feel slower than vegetative growth, but week by week, major transformations are happening. Understanding that rhythm helps you stay patient and harvest at the right time.
The Cannabis Flowering Stage Week by Week
The flowering period is when your plants stop preparing and start producing. Once you adjust your light cycle (if you’re using grow lights), your cannabis plants shift fully into reproductive mode. From that moment on, every week brings visible changes in structure, aroma, and resin production.
Understanding how the flowering stage unfolds week by week helps you anticipate what’s normal, what’s not, and when to step in. Or step back.
Week 1–2: The Transition (The Stretch Begins)
The first two weeks of the flowering process are often called “the stretch.” Your plants may grow rapidly—sometimes doubling in height—as they transition to bud development. You’ll start to see the first white pistils forming at the nodes, confirming that female plants are entering flower.
What to look out for:
- Excessive vertical stretch (especially under weaker lighting)
- Early signs of male pollen sacs
- Nutrient imbalances as feeding needs shift
Action step: Gradually reduce nitrogen and introduce bloom nutrients higher in phosphorus and potassium. If you’re growing indoors, adjust light height to prevent stretching while avoiding light stress.
Week 3–4: Early Flower Formation
At this stage, distinct bud sites form along each branch. The plant redirects its energy into flower production, and small clusters of white hairs become more pronounced. Resin glands begin developing, and the aroma becomes noticeable.
What to look out for:
- Uneven canopy development
- Humidity creeping too high
- Signs of nutrient burn as feeding increases
Action step: Maintain humidity around 45–55% and ensure good airflow. Light defoliation (if necessary) can improve light penetration to lower bud sites, but avoid heavy stress during this critical phase.
Week 5–6: Mid-Flower – Bud Development Accelerates
This is when cannabis buds begin stacking and gaining density. Trichome production increases, and your plants begin producing stronger aromas. At this point, most plants change their focus entirely to resin and terpene output rather than structural growth.
What to look out for:
- Nutrient burn from aggressive feeding
- Heat stress causing foxtailing
- Rising risk of mold in dense buds
Action step: Lower humidity to around 40–45%, monitor leaf tips for burn, and ensure strong but indirect airflow around developing colas. Support heavy branches with stakes or trellis netting if needed.
Week 7–8+: Late Flower – Ripening Phase
During late flower, rapid bud growth slows, and maturation takes priority. Pistils darken and curl inward, and trichomes transition from clear to milky. Bud density increases, and terpene profiles peak.
What to look out for:
- Bud rot in dense colas
- Light burn on upper flowers
- Nutrient buildup in the soil
Action step: Lower humidity to 35–45%, inspect buds daily for mold, and begin tapering nutrients if you plan to flush. Stability is key: avoid making dramatic environmental changes this late.
Final 1–2 Weeks: Harvest Window
This is the refinement stage. Trichomes shift from milky to amber, signaling peak cannabinoid maturity. Fan leaves may fade as the plant redirects remaining energy into the buds. Growth has largely stopped; now it’s about timing.
What to look out for:
- Mostly cloudy trichomes with some amber for balanced effects
- Overripening if you delay too long
- Stress from unnecessary last-minute adjustments
Action step: Use a magnifier to monitor trichomes closely. Keep conditions steady, reduce humidity, and resist the urge to “fix” things that aren’t broken. At this stage, patience protects quality.
Identifying and Removing Male Cannabis Plants
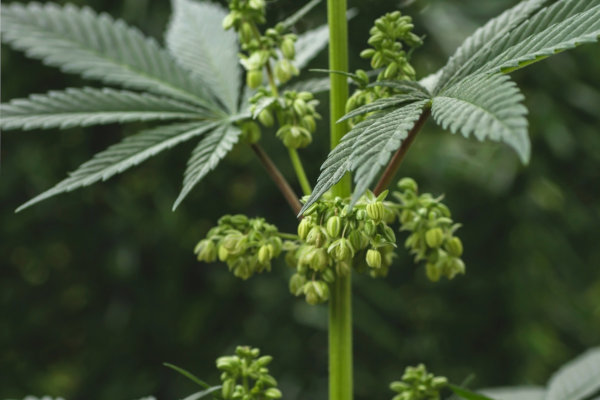
By the time your plants enter flowering, your goal is clear: healthy female cannabis plants producing resin-rich buds covered in white hairs. Those white hairs (pistils) are early indicators that your plant is female and focused on flower production.
Male plants, however, change the outcome entirely. Identifying and removing them early is essential if your goal is high-quality, seedless buds.
Why Male Plants Are a Problem in Flowering
Male plants don’t produce dense buds. Instead, their purpose is pollination. If pollen reaches female plants, the plant shifts its energy away from resin production and toward growing seeds.
Research on Cannabis sativa shows that pollination can significantly alter cannabinoid composition and reduce extract yield, as plants redirect energy toward seed production. That means lower potency, reduced yield, and less desirable bud structure.
If you’re cultivating for sinsemilla (seedless cannabis), removing males quickly is critical to protecting your harvest.
How to Identify Male Pre-Flowers
Male cannabis plants typically grow small pollen sacs at the nodes, where branches meet the main stem. These sacs look like tiny round balls and do not produce white hairs. In contrast, female plants develop calyxes with thin white pistils emerging from them.
Inspect plants closely during early flowering, especially in Weeks 1–3. Catching males early prevents accidental pollination before pollen sacs open.
Hermaphrodite Plants in Flowering
Sometimes a plant develops both male and female reproductive parts. These hermaphrodites can appear due to genetic instability or environmental stress, such as light leaks, temperature swings, or physical damage.
Hermaphrodites may produce small yellow “banana-shaped” pollen structures within developing buds. Even a few of these can release pollen and seed your crop.
If you spot one, act quickly. Depending on severity, you may remove the pollen sacs carefully or remove the entire plant to avoid risking the rest of your grow.
Safe Removal Techniques
When removing male or hermaphrodite plants, timing and care matter.
- Remove plants as soon as sex is confirmed.
- Turn off fans before handling to prevent pollen spread.
- Gently place a plastic bag over the plant before moving it.
- Remove it from the grow area immediately.
- Clean and inspect surrounding plants afterward.
Best Conditions for Flowering Cannabis Plants
Now that you have an overall understanding of the whole process, let’s dive into the specifics, along with common problems and how to avoid them. The cannabis flowering stage rewards precision. Small environmental inconsistencies that didn’t matter much during the vegetative stage can directly affect bud size, density, and terpene expression.
Dialing in light, temperature, humidity, and airflow gives your plants exactly what they need to finish strong.
Light Requirements During Flowering
The most important environmental trigger during flowering is the light cycle. While vegging plants typically receive 18–24 hours of light per day, flowering cannabis plants require a strict 12 hours of light and 12 hours of darkness (for photoperiod strains). Consistency is critical. Even small interruptions can stress plants.
Best practices:
- Keep a strict 12/12 schedule (use timers, don’t rely on memory).
- Position lights at the proper distance to avoid bleaching or heat stress.
- Ensure even canopy coverage to prevent underdeveloped lower buds.
- Avoid adjusting your light cycle mid-flower unless absolutely necessary.
Why Darkness Is Critical in the Flowering Stage
This is where many growers underestimate the details. Flowering plants require uninterrupted darkness to maintain hormonal balance. During the dark cycle, phytochrome levels shift, signaling the plant to continue growing buds.
If that darkness is interrupted (even briefly), the plant can become stressed. Think of the dark period as sacred. Protect it.
Light leaks may cause:
- Delayed flowering
- Reduced yields
- Hermaphroditism (plants developing both male and female parts)
Preventative steps:
- Check your grow space for light leaks before flowering begins.
- Avoid opening your tent during lights-off.
- Cover LED indicators or external light sources inside the grow area.
Temperature for the Flowering Stage
Temperature plays a direct role in bud density and terpene preservation. Lower temperatures late in flower may help preserve terpene profiles, but extreme cold can stall growth. Aim for stability over perfection. Sudden swings stress plants more than slightly imperfect numbers.
Ideal ranges:
- Lights on: 68–78°F (20–26°C)
- Lights off: Slightly cooler, but avoid dramatic drops
High temperatures can lead to:
- Airy buds
- Reduced resin production
- Increased risk of foxtailing
Humidity Levels During Flowering
Managing relative humidity becomes increasingly important as buds thicken. If humidity rises too high, consider a dehumidifier or increase air exchange. As buds get denser, moisture control becomes non-negotiable.
General guidelines:
- Early flower: 45–55%
- Mid flower: 40–50%
- Late flower: 35–45%
What to watch for:
- Condensation on walls or leaves
- Musty smells
- Poor airflow in the canopy
Airflow and CO₂ Considerations
Air movement supports healthy flowering by strengthening stems, regulating leaf temperature, and reducing mold risk. Airflow should be steady but not harsh; leaves shouldn’t look windburned.
Use oscillating fans to:
- Prevent stagnant air pockets
- Improve transpiration
- Reduce fungal risk
Regarding CO₂: in sealed indoor environments, elevated CO₂ levels can enhance photosynthesis and increase yields, but only when light intensity, temperature, and nutrients are already optimized. Adding CO₂ without dialing in the basics won’t fix underlying issues.
Nutrients in the Cannabis Flowering Stage
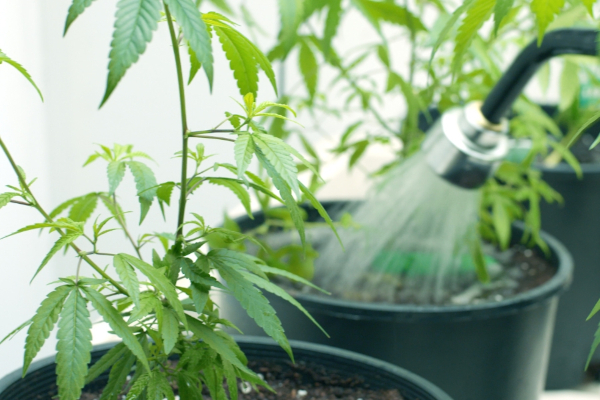
Feeding during the cannabis flowering stage is about precision, not excess. As your plants shift from structural development to bud production, their nutritional demands change. Properly supporting this phase helps maximize yield, terpene expression, and overall flower quality while avoiding common issues such as deficiencies or burn.
Macronutrient Shift (N-P-K Explained)
As flowering begins, your plant’s macronutrient priorities change. Nitrogen (N), which fueled leafy growth during veg, becomes less important. Phosphorus (P) and potassium (K) take center stage to support root strength, bud formation, and resin production.
This is why many growers switch to bloom nutrients, formulated with higher P and K ratios. The goal is to feed plants properly without overloading them. Too much nitrogen in flower can lead to excessive leafiness and reduced bud density. Adjust gradually, not abruptly. A smooth transition helps prevent shock.
Micronutrients That Matter
As your cannabis plant grows through the flowering phase, secondary nutrients and trace minerals play a critical supporting role. Calcium, magnesium, sulfur, and micronutrients like iron and zinc all contribute to healthy bud development.
While macronutrients get most of the attention, most growers learn that deficiencies in these smaller elements can limit results just as much. Calcium and magnesium, in particular, are common trouble spots in indoor setups. Balanced feeding (not just bigger feeding) is what drives quality.
Feeding Schedule by Flowering Phase
Nutrient intensity should match the stage of plants growth during flowering.
- Early flower: Transition nutrients; moderate feeding.
- Mid flower: Peak feeding period as bud stacking accelerates.
- Late flower: Gradual reduction in nutrient strength.
- Final phase: Some growers choose to flush, while others taper feeding significantly.
The key is observation. If leaves remain vibrant and buds are swelling steadily, you’re on the right track.
Nutrient Burn in Flowering – Signs & Solutions
Overfeeding during flowering is one of the most common mistakes. Nutrient burn typically appears as browning leaf tips, curling edges, and unusually dark foliage, which are common indicators of nutrient stress in plants.
While it might seem like “more food equals bigger buds,” excessive nutrients can damage roots and disrupt uptake, compromising healthy foliage and flower development. When it comes to flowering nutrition, restraint often produces better results than excess.
What to do:
- Reduce feeding strength immediately.
- Flush with properly pH-balanced water if buildup is severe.
- Resume feeding at a lower concentration once plants recover.
Common Problems During the Cannabis Flowering Stage
Even when your environment and feeding schedule look solid, issues can still pop up during flowering. The key is early detection and measured corrections.
Here are some of the most common problems growers face:
- Foxtailing
Foxtailing occurs when buds develop elongated, stacked calyx growth that resembles a fox’s tail. Sometimes this is genetic—especially in certain sativa strains—and not necessarily a bad thing. However, environmental foxtailing is often caused by excessive heat or light intensity.What to do: Check canopy temperature and raise grow lights if tops are too close. If it’s genetic, there’s usually no need to intervene.
- Bud Rot (Botrytis)
Bud rot is a fungal infection that thrives in high humidity and dense flowers. It often starts inside thick colas, making it difficult to detect early. You may notice browning, mushy spots, or a musty smell.What to do: Immediately remove affected buds and lower humidity. Increase airflow and inspect surrounding flowers daily to prevent spread.
- Nutrient Lockout
Nutrient lockout happens when pH imbalance or salt buildup prevents your plant from absorbing nutrients—even if they’re present in the soil. Leaves may show deficiency symptoms despite regular feeding.What to do: Test and correct pH levels, flush the medium if necessary, and resume feeding at a balanced concentration.
- Heat Stress & Light Burn
Excessive light intensity or high temperatures can bleach the tops of buds, curl leaves upward (“tacoing”), and reduce resin production.What to do: Increase the distance between lights and canopy, improve ventilation, and maintain stable temperature ranges.
- Overwatering in Flower
Overwatering limits oxygen at the root zone, slowing nutrient uptake and potentially reducing bud development. Plants may appear droopy despite moist soil.What to do: Allow the medium to dry appropriately between waterings and ensure proper drainage. Healthy roots are essential for dense, high-quality flowers.
Signs Your Cannabis Plant Is Ready for Harvest
Knowing when to harvest is one of the most important decisions you’ll make during the flowering stage. As buds mature, visual cues become your most reliable guide. Trichomes, those tiny resin glands covering the flowers, shift from clear to milky white, and eventually to amber. Milky trichomes generally signal peak potency, while more amber tones often indicate a more relaxing effect profile.
Pistils also change, darkening and curling inward as the plant finishes its reproductive cycle. You may notice fan leaves fading as nutrients are redirected into the final stages of flower development. At this point, bud growth slows significantly, and density reaches its peak.
Rather than relying strictly on the calendar, use a magnifier to examine trichomes closely. Harvesting too early can mean underdeveloped potency and yield, while waiting too long may alter the overall effects. When most trichomes are cloudy with a touch of amber—and your buds look swollen, resinous, and aromatic—you’re likely in the ideal harvest window.
Indoor vs. Outdoor Flowering Differences
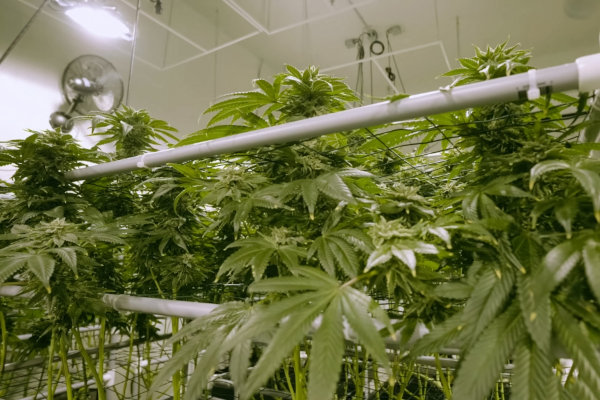
The flowering stage looks similar on the plant itself, but your level of control changes dramatically when you’re growing outdoors versus cultivating indoors. Environment, timing, and risk factors all shift depending on your setup, and those differences can directly impact bud quality and yield.
Environmental Control
An indoor grower has the advantage of precision. Inside a controlled grow room, you regulate light cycles, temperature, humidity, and airflow down to the hour. That control allows you to optimize conditions throughout the entire flowering stage and respond quickly to problems.
Outdoors, environmental factors depend on climate and season. Temperature swings, humidity spikes, and shifting daylight hours happen naturally. While sunlight is powerful and free, it comes without a dimmer switch.
Indoor cultivation prioritizes consistency. Outdoor cultivation relies on adaptation.
Pest Exposure
Flowering plants outdoors face greater exposure to insects, animals, and airborne pathogens. Caterpillars, aphids, mites, and even birds can damage developing buds.
Indoors, pest pressure is typically lower, but infestations can spread quickly in enclosed spaces if introduced. Preventative measures (like clean grow practices and regular inspections) are essential in both environments.
During flowering, pest management becomes more delicate. Harsh treatments can compromise bud quality, so early detection is critical.
Weather Risks
Outdoor flowering plants are vulnerable to heavy rain, strong winds, early frost, and prolonged humidity. Excess moisture during late flower significantly increases the risk of mold and bud rot.
Indoor growers avoid these weather-related threats but must still manage equipment failures. Power outages or ventilation breakdowns can cause rapid environmental shifts that stress plants. Planning ahead reduces risk in both setups.
Harvest Timing Differences
Indoor growers determine exactly when flowering begins by adjusting the light cycle, which makes harvest timing more predictable. This control simplifies scheduling and helps align production goals with a planned, successful harvest.
Outdoor growers depend on natural daylight reduction. Harvest timing is influenced by seasonal patterns and regional climate, which can shorten or extend the flowering window. Monitoring trichomes becomes especially important as weather conditions change late in the season.
Both approaches can produce exceptional results. The key is understanding your environment and managing it proactively to protect flower quality through the final weeks.
Final Tips for Maximizing Yield and Quality During Flowering
The flowering stage is the most decisive stage of cannabis cultivation. As you move through the bloom phase, focus on precision, patience, and consistency to get the best possible yields.
- Keep environmental conditions stable: this stage of cannabis responds better to consistency than constant adjustments.
- Avoid overfeeding late in the bloom phase; most cannabis strains don’t benefit from aggressive last-minute nutrient increases.
- Reduce humidity gradually in late flower to protect dense buds from mold.
- Support heavy branches, especially with indica plants that develop thick, weighty colas.
- Monitor trichomes closely instead of relying on the calendar for harvest timing.
- Maintain strong but gentle airflow to protect terpene quality and bud structure.
- Resist the urge to “fix” minor cosmetic leaf issues during the final weeks and focus on overall plant health.
Final Word: Where Preparation Becomes Performance
The flowering stage isn’t just the final stretch of the grow cycle; it’s the moment everything you’ve done so far either compounds or unravels.
By the time your plants enter this phase, structure has already been built. Now it’s about refinement. The growers who see consistently impressive results aren’t the ones making dramatic last-minute changes. They’re the ones who understand timing, protect the environment, and let the plant complete its natural rhythm.
When you approach flowering with clarity and intention, yield improves, terpene profiles stay intact, and quality speaks for itself. At this stage, success isn’t about doing more. It’s about doing the right things consistently.