
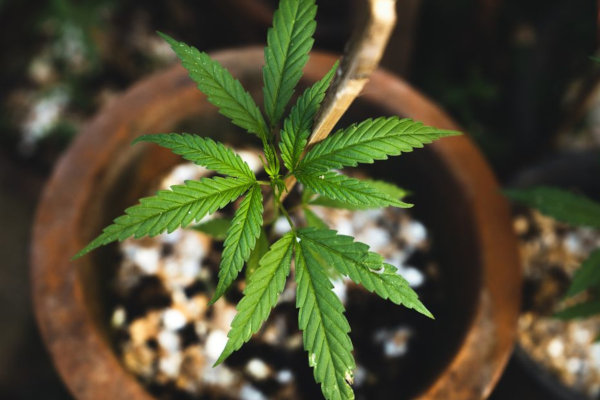
So, you want to learn how to grow weed at home? Respect.
There’s something magical about watching a tiny weed seed turn into a leafy green roommate that eventually rewards you for your patience.
Whatever your reason, cultivating cannabis is part hobby, part art form, and part very chill science experiment.
You don’t need a high-tech setup or years of experience. Just some light, good soil, the right cannabis seeds, and the kind of attention you’d normally give a favorite houseplant.
This guide walks you through every stage of the process, from choosing your first strain to curing your final stash. You’ll learn what equipment actually matters, how to avoid rookie mistakes, and when to harvest your flower.
But First: How to Grow Weed Fundamentals
Take a moment to set yourself up for success before you dive into growing cannabis. A little planning goes a long way — knowing the laws, having the right gear, and keeping your budget realistic will make your first grow smoother and far more enjoyable.
Check Your Cannabis Laws
Before you start growing marijuana yourself, take a quick look at your state cannabis laws. Rules around home cultivation for personal use vary by region. Brush up on things like plant limits, grow locations, or permit requirements, just in case.
Gather Your Gear and Plan Your Budget
Lighting, airflow, and good soil form the backbone of successful cannabis cultivation. You don’t need a huge budget or fancy equipment to start growing weed at home like a champ.
Here’s what to focus on:
- Lighting: Full-spectrum LEDs are efficient, low-heat, and ideal for beginners growing weed indoors. CFLs work for smaller grows, while HIDs (MH/HPS) are better for larger setups.
- Pots and soil: Get breathable fabric pots filled with loamy, well-draining soil to keep roots healthy.
- Airflow and fans: A couple of small oscillating fans are enough to keep air moving and your seedlings or plants happy.
- Timers: Use a simple plug-in timer to control your light schedule.
- pH meter: A basic digital pH meter ensures your water and nutrients are in the sweet spot.
- Optional upgrades: Grow tents, carbon filters, and hygrometers add stealth and control, but they’re not required to grow great weed.
Quick tip: Keep it simple. A good light, steady airflow, quality soil, some pots, and a simple pH meter are all you need to start growing weed at home.
Step 1: Choose a Growing Method
Every grower develops their own style. Some love the precision of indoor setups, others swear by the simplicity of sun-grown buds. There’s no single “right” way to grow cannabis at home, but here are a few things worth considering:
Growing Cannabis Indoors vs. Outdoors
Indoor growing gives you more control. You decide the temperature, humidity, and light cycle, so your plants thrive year-round no matter what’s happening outside. The trade-off is that it can cost more upfront for lights, ventilation, and equipment. On the upside, you’ll get consistent results and stealthy privacy.
Outdoor growing is simpler and less expensive. The sun is your grow light, the wind handles ventilation, and nature sets the rhythm. You’ll need to plan around the seasons and local climate, but when conditions line up, outdoor-grown cannabis can reach impressive size and deliver higher yield potential, with rich, natural flavors to match.
Soil vs. Hydroponics
The growing medium sets the tone for your cultivation journey. Some growers like keeping it natural with soil, others prefer the control of hydro or the balance of coco coir.
- Soil is a simple, easy option. It’s forgiving, holds nutrients well, and produces rich, aromatic flower.
- Hydroponics swaps soil for water and nutrient solutions. Cannabis plants grow faster and yield more, but it takes more monitoring and precision.
- Coco coir sits right in the middle. Made from coconut husks, it’s airy, sustainable, and easy to manage.
Quick tip: If you’re new to growing weed, start with good-quality, loamy soil. It’s hands-down the easiest medium to use.
Step 2: Understand the Lifecycle of a Cannabis Plant
Before you get your hands dirty, it helps to understand a marijuana plant’s grow cycle. Female plants produce buds, while males produce pollen that can fertilize them, as outlined in the cannabis plant lifecycle and reproduction stages. They’re great for breeding, but not ideal if you’re after high-quality, smokable flower.
Here are the growth stages of a bud-bearing cannabis plant:
| Grow Cycle Stage | What Happens | Approximate Duration |
|---|---|---|
| Germination | Cannabis seeds sprout and a tiny taproot emerges. | 1–10 days |
| Seedling | Young plants start developing their first true leaves. | 2–3 weeks |
| Vegetative Stage | The roots dig deep, stems thicken, and new leaves fan out fast. This is when you train and shape your cannabis plant. | 3–16 weeks |
| Flowering Stage | Buds begin to form, trichomes start sparkling, and your grow space smells incredible. | 6–12 weeks |
| Harvest | When the trichomes turn milky and the pistils darken, it’s showtime. You’ve brought your grow full circle. | 1–3 days |
| Drying & Curing | After drying, a slow, patient cure coaxes out the best aroma and flavor, turning good weed into amazing weed. |
Drying: 7–10 days
Curing: 2–4 weeks
|
Quick tip: Photoperiod cannabis plants usually take 12–30 weeks from seed to harvest, while autoflowers finish faster in 8–12 weeks. But timing varies with genetics, strain type, and grow conditions.
Step 3: Pick the Right Cannabis Seeds
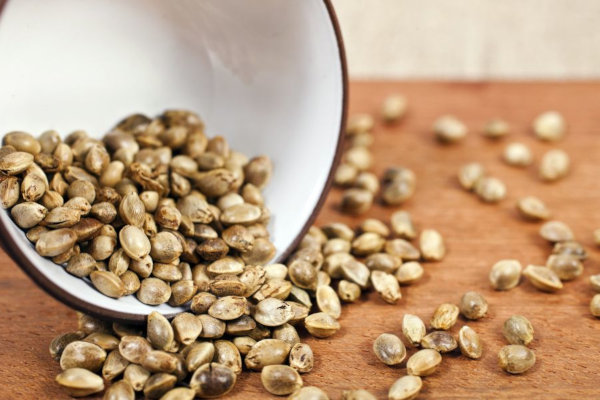
Now that you’ve got a sense of how and where you’ll grow, it’s time to pick what you’ll grow. Choosing cannabis seeds is one of the most exciting parts of the process. It’s where science meets personality.
Feminized vs. Autoflower vs. Fast Flowering vs. Regular Seeds
Feminized seeds grow into bud-producing female plants 99.9% of the time. They spare you the chore of removing male plants that pollinate your crop and turn beautiful colas into seed-filled heartbreak. Most fem seeds are also photoperiodic — they rely on light cycle changes to begin flowering.
Regular cannabis seeds are the old-school standard, growing into male or female plants. They’re ideal for growers who want to experiment with new genetics or clone their favorite plants.
Autoflowering seeds start flowering automatically based on age rather than light changes. Thanks to their Cannabis Ruderalis genetics, their flowering period is shorter, meaning faster harvests and fewer steps to manage. Compact and beginner-friendly, autos are perfect for small spaces, first timers, and anyone wanting speedy, year-round harvests.
Fast flowering seeds (sometimes called fast version seeds) flower quicker than standard photoperiod strains, but unlike autos, they still rely on light cycles. They’re ideal for outdoor growers in shorter summers or anyone wanting a faster turnaround without going full auto.
Quick tip: If you’re new to growing cannabis, start with feminized or autoflower seeds. They’re easy, reliable, and get you to harvest faster.
Choose a Cannabis Strain You’ll Love: Indica, Sativa, or Hybrid?
This is where cannabis cultivation gets personal. Every variety has its own personality — how it grows, smells, tastes, and ultimately makes you feel. Here are the three main genetic groups that shape everything from size to effects:
| Cannabis Strain Type | Growth Traits | Effects & Best Use |
|---|---|---|
| Cannabis Indica Strains | Short and bushy with broad leaves and dense buds. | Relaxing and body-focused. Great for evenings or easing physical tension. |
| Cannabis Sativa Strains | Grows taller and leaner with lighter, airier buds. | Uplifting, cerebral, and energizing. Best for daytime use or creative focus. |
| Hybrid Strains | A mix of indica and sativa genetics. | Balanced effects that can lean more calming or energizing. Most modern weed strains are hybrids. |
Quick tip: Hybrids are popular among first-time growers. They offer the best of both worlds in terms of growing and effects
Think About the Experience You Want
Your strain choice shapes not just how your cannabis plants grow, but how your weed will smell, taste, and feel. Keep these factors in mind:
- Terpenes: These natural compounds define aroma and flavor, from fruity or citrusy to earthy, spicy, skunky, cheesy, or sweet. They also subtly influence the effects.
- THC and CBD Content: High-THC strains (20%+) deliver strong, fast-acting effects, while moderate-THC strains (10–20%) provide a balanced experience. Low-THC or CBD-rich strains are often used for wellness, stress relief, and daytime clarity.
- Overall vibe: Do you want something energizing and creative for daytime, or relaxing and body-heavy for nights in?
Match Your Seeds to Your Goals
The best cannabis seeds depend on what you want from your grow — your goals, space, and desired effects all play a role.
- Choose beginner-friendly seeds if you want an easy first grow. These genetics are stable, resilient, and fast to finish, making them perfect for learning how to grow weed with minimal stress.
- Choose high-THC seeds if potency is your priority. Expect dense, resinous buds and strong, fast-acting effects.
- Choose CBD-rich seeds if you’re growing for wellness or balance. These strains promote calm, clarity, and relaxation without an intense high.
- Choose high-yield seeds if you want bigger harvests in less time. Ideal for growers focused on efficiency and output.
- Quick tip: Reputable seed banks list key grow details like strain difficulty, yield, potency, and type. Use that info to find seeds suited to your goals and experience level.
Where to Buy High-Quality Marijuana Seeds Online
Trusted seed banks provide lab-tested genetics, detailed strain information, and often a germination guarantee. Many also provide things like cannabis grow kits, giving beginners an extra confidence boost as they learn how to grow weed. Here’s what else to look for:
- Transparency: Clear strain descriptions, including lineage, flowering time, yield, and effects.
- Germination support: Retailers that stand behind their seeds and replace any that don’t sprout.
- Customer feedback: Verified reviews and grow diaries that confirm reliability.
- Safe, legal shipping: Discreet, compliant delivery to your region.
Quick tip: Take advantage of deals from top-notch seed banks. Buy-one-get-one offers, freebies, and mix packs are an affordable way to test different strains and find what you like best.
Step 4: Time to Germinate Your Cannabis Seeds
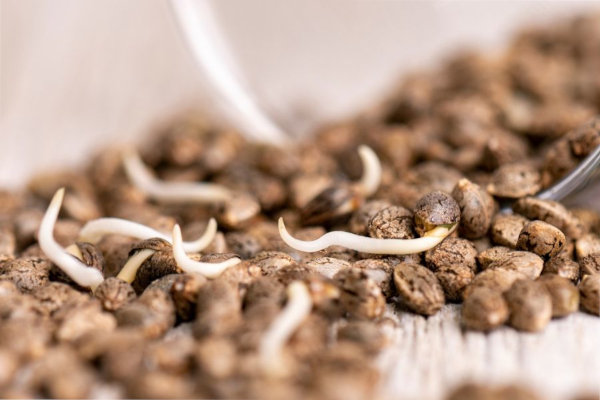
The germination stage marks the beginning of your plant’s life. While there are a few ways to sprout cannabis seeds, the paper towel method is an easy germination technique for new growers.
First, you’ll need your seeds, purified water, two clean dinner plates, paper towels, and sterilized tweezers. Then:
- Prepare your setup. Lay a damp paper towel on a plate and place your seeds on top.
- Cover them up. Add another moist paper towel over the seeds. Cover it with the second plate, and make sure there’s no runoff or standing water.
- Keep them cozy. Store the plates in a warm, dark, and undisturbed spot around 70°F.
- Check on them daily. Keep the towels consistently moist (not dry or dripping). Weed seeds usually crack open within 1–8 days.
Quick tip: As soon as you see the tiny white taproots emerge, your seeds are ready to plant in soil or starter plugs.
Step 5: Plant Your Sprouted Weed Seedlings
This step kicks off the seedling stage, one of the most exciting parts of growing cannabis at home. Handle your young plants gently and give them the right start to set the tone for the rest of your grow. Here’s how:
- Fill small pots or starter plugs with light, airy soil that drains well, and make a shallow hole about ½ inch deep.
- Place each seed taproot-down, cover it lightly with soil, and mist the surface until it’s evenly moist (not soaked).
- Within a few days, your cannabis plants will begin to stretch upward and show their first green leaves.
Quick tip: Don’t pack the soil too tightly. Roots need air and space to expand for healthy plant growth later on.
Step 6: Nurture Your Cannabis Seedlings
The seedling stage is where your marijuana plants find their footing. These first few weeks build roots, strength, and structure. Give them the right care now, and they’ll reward you later.
Cannabis seedlings thrive on consistency. Here’s what to bear in mind if you’re growing indoors:
- Lighting: Keep an 18/6 schedule (18 hours on, 6 off). Place your lights 12–24 inches above the canopy to avoid heat stress.
- Temperature: Aim for 70–80°F during the day and no lower than 65°F at night in your grow space.
- Humidity: Maintain high humidity, around 60–70% early on, then lower it gradually as the plants mature. If the air feels too dry, use a humidifier or place a tray of water near your plants. If it’s too humid, open vents or run a fan to improve airflow.
- Watering: Water plants only when the top inch of soil feels dry, and use small amounts so roots can breathe.
- Nutrients: Seedlings don’t need feeding right away. Most organic fertilizer and soil mixes have enough nutrients for the first 2–3 weeks.
If you’re growing outdoors, start your seedlings inside or in a sheltered spot. Once they have a few sets of true leaves and nights stay above 60°F, begin hardening them off. Give them a few hours of outdoor time each day, slowly increasing sun exposure and wind.
Quick tip: Use a small fan or open vent to improve air circulation. A gentle breeze strengthens stems and helps prevent mold or mildew.
Step 7: Transplant Your Young Cannabis Plants
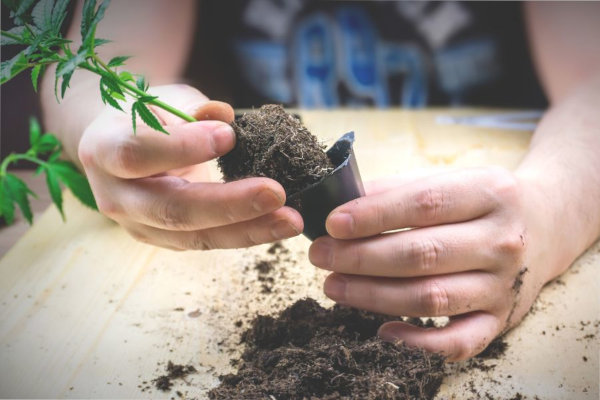
When your seedlings have 3–4 sets of true leaves, it’s time to give them more room. This is one of the most satisfying steps in cannabis cultivation — watching your baby plants spread out and settle into their new space.
Here’s how to transplant young marijuana plants successfully:
- Choose the right sized pot. A final 3–5 gallon pot is the easiest option for direct planting. It gives roots plenty of room to grow and saves you from extra transplanting later. You can use a smaller 1–3 gallon pot if space is tight, but that means you’ll need to move the plant again as it matures.
- Fill it up with fresh, airy soil. Make a small hole for the root ball.
- Water your plant lightly a few hours beforehand. This keeps the soil moist and intact and for a smoother transplant.
- Move it to the new pot. Hold your cannabis plant gently by the base of the stem, keeping the roots together, and set it into place. Cover it with soil, and water it lightly.
Quick tip: A little transplant shock is normal. Your plant might droop for a day or two while it adjusts. Keep the light moderate and the soil evenly moist, and it’ll bounce back quickly.
Step 8: Let Your Crops Thrive in the Vegetative Stage
Now that your crops have settled into their new pots, it’s time for them to really start growing. The vegetative stage is where cannabis plants flourish in size, strength, and structure.
This stage usually lasts 3–16 weeks, depending on the strain and whether you’re growing marijuana indoors or outside.
Set the Right Light Schedule
If you’re growing indoors, make sure your lights stay about 18–24 inches above the canopy. Raise them as your marijuana plants grow to avoid light stress or bleaching.
For healthy vegetative growth, keep your lights on for 18 hours a day and off for 6 hours. Some growers use 20/4 for faster growth, but either schedule works well.
Outdoors, just make sure your plants get at least six hours of direct sunlight each day.
Quick tip: Keep lighting consistent. Sudden changes in the light cycle can stress your cannabis plants and slow growth.
Feed and Water Your Vegging Plants Thoughtfully
Opt for a vegetative nutrient formula that’s higher in nitrogen (N) to support leaf and stem growth. Start with a half-strength dose and increase it gradually as your plants respond.
Water your crops when the top inch of soil feels dry. It’s better to water thoroughly but less often than to give frequent, smaller sips — roots need both moisture and oxygen to thrive.
Quick tip: Check the pH of your water or nutrient mix before feeding. Aim for a pH of 6.0–6.5 in soil to keep nutrients available and prevent lockout.
Keep Growing Conditions Stable
Vegging cannabis plants thrive in conditions that are warm but not too humid. For indoor growing, keep temperatures around 70–85°F during the day (and a few degrees cooler at night) with humidity levels at 50–60%.
Growing cannabis outdoors?
Consistency still matters. Choose a sunny, sheltered spot that gets enough airflow and at least six hours of direct sunlight each day. Keep an eye on temperature swings and weather changes. A little protection from heavy wind or rain will go a long way toward keeping your plants happy.
Quick tip: Use a fan to keep fresh air moving around your grow space. It strengthens stems and helps prevent pests or mold.
Recognize Healthy vs. Stressed Plants
Healthy cannabis plants grow steadily, maintain vibrant green leaves, and show few signs of stress. When conditions aren’t quite right, plants often reveal the problem through changes in leaf color, shape, or overall appearance.
Learning to recognize these common signs of plant stress and nutrient imbalance early can help you correct issues before they affect growth and yield.
If something feels off, your plants will tell you:
- Overwatering: Leaves droop or curl downward, and the soil stays wet for too long.
- Underwatering: Leaves wilt and feel dry or papery to the touch.
- Nutrient imbalance: Yellowing or burnt leaf tips usually mean too much fertilizer.
- Light stress: Leaves bleach or curl upward if your lights are too close.
Quick tip: When in doubt, make small changes. Cannabis bounces back fast once conditions improve — just keep your routine steady and avoid overcorrecting.
Train and Prune Your Plants for Explosive Growth
The vegetative stage is the perfect time to shape plant growth. A little training goes a long way toward stronger stems, better airflow, and bigger harvests down the line.
Start simple with Low-Stress Training (LST). This beginner-friendly method involves gently bending and tying down flexible branches to spread your cannabis plant’s canopy outward.
By keeping the top branches level, light reaches more bud sites, and your plant grows wider instead of taller. It’s perfect for growing weed indoors or keeping a stealthy profile.
Here’s how to try LST:
- Wait until your plant has 4–6 nodes (sets of leaves).
- Gently bend the main stem sideways and secure it with soft plant ties or garden wire.
- As new branches grow upward, tie them down too, creating an even, open shape.
- Adjust ties as your plant grows, keeping tension gentle to avoid damage.
Pair light training with occasional pruning. Remove small lower leaves or weak branches that won’t get much light. This directs your plant’s energy toward the top growth, where your future buds will form.
Quick tip: Always use clean tools and take your time when bending or cutting. If you hear a crack, stop — your plant will usually heal, but gentle handling keeps it thriving.
Step 9: Coax Out Those Beautiful Buds During the Flowering Stage
This is one of the most rewarding parts of growing cannabis. The flowering stage is when your plants start putting energy into forming dense, aromatic buds.
Flowering can last anywhere from 6–12 weeks, depending on the strain type, environment, and genetics. Here’s everything you need to know about this stage of the grow cycle:
- Weeks 1–3: Flowering plants stretch and may double in height.
- Weeks 4–6: Buds stack up and resin builds.
- Weeks 7–8+: Harvest time, when trichomes become cloudy and aromas peak.
When and How to Initiate Flowering
For photoperiod strains, flowering begins once your plants receive 12 hours of light and 12 hours of darkness per day. Indoors, this is called the flip. Here’s when and how to do it:
- Switch the light cycle when plants are about half their desired final height, since they’ll stretch quickly once flowering starts.
- Use a timer for your 12/12 schedule. Even brief light leaks can slow or disrupt budding.
- Keep the dark period uninterrupted to avoid light stress and hermaphroditism.
Outdoors, flowering starts naturally as days shorten toward the end of summer. Autoflowers skip the light change altogether, blooming automatically about 3–5 weeks after germination.
Quick tip: When in doubt, flip early. Smaller, evenly lit plants produce better-quality buds than overcrowded ones.
Fatten Up Your Flowering Plants
As your cannabis plants focus on growing buds, their needs change a little — less nitrogen, steadier watering, and a cleaner, calmer environment. Keep these factors on point for healthy flowering plants:
- Feeding: Switch to a nutrient mix or organic fertilizer higher in phosphorus (P) and potassium (K) but lower in nitrogen (N). These nutrients boost flower growth and resin production. Start light and increase gradually as your plants respond.
- Watering: Water flowering plants thoroughly until you see some runoff, then let the soil dry slightly before watering again.
- Light and airflow: Keep lights around 18 inches above the canopy, adjusting as your plants grow taller. Maintain gentle airflow to prevent mold from forming between dense buds.
- Humidity and temperature: Aim for 40–50% humidity and daytime temps around 68–80°F. A slightly cooler night helps bring out color and aroma in some strains.
Quick tip: Be patient. The last few weeks are when your buds gain most of their weight and potency, so resist the urge to rush or overdo it.
Step 10: Harvest Your Cannabis Buds Like a Ninja
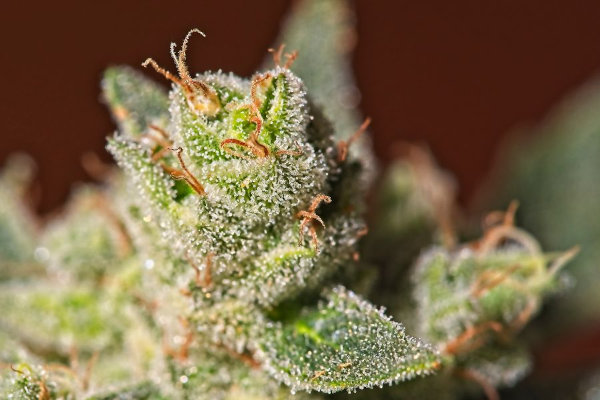
You’ll know it’s time to harvest your buds when the trichomes — those tiny, crystal-like resin glands — turn cloudy with a few amber ones mixed in. This means THC has peaked and your buds are at full potency. At the same time, the pistils darken and curl inward.
Use a magnifying glass or jeweler’s loupe to check closely. A few extra days of patience can make a huge difference in aroma, flavor, and effect.
Here’s how to harvest your cannabis buds like a pro:
- Prepare your space. Choose a clean, dry area with good airflow and moderate humidity (around 50%).
- Harvest in low light or right before lights come on. This helps preserve terpenes and prevents heat stress.
- Cut whole branches or individual buds. Use clean, sharp scissors or pruning shears. Handle buds gently to protect the trichomes.
- Remove the fan leaves. Trim away the large outer leaves to improve airflow during drying.
Quick tip: Harvest too early and potency drops; wait too long and the high turns heavier. Aim for that sweet middle ground — mostly cloudy trichomes with a few amber ones for balance.
How to Trim Your Buds (Wet vs. Dry)
Once harvested, you can trim your buds right away (wet trim) or after drying (dry trim).
- Wet trimming is easier and faster, great for humid climates since it prevents mold.
- Dry trimming takes longer but preserves more terpenes and aroma.
Quick tip: Use clean scissors, trim excess leaves around the buds, and handle them gently to protect those delicate trichomes.
Step 11: Dry and Cure Your Buds to Perfection
Here’s where growing weed truly pays off — where you’ll turn fresh buds into something truly smoke-worthy. Drying and curing bring out your buds’ best flavor, smoothness, and potency.
Drying Your Cannabis Buds
Hang your trimmed branches or buds upside down in a dark, well-ventilated space with:
- Temperatures of 60–70°F.
- Humidity levels around 50–55%
- Airflow that’s gentle and indirect.
Drying usually takes 7–10 days, but you’ll know your cannabis buds are ready when the smaller stems snap instead of bend.
Quick tip: Avoid drying your buds too fast — slow and steady keeps flavors rich.
Curing Your Buds for Ultimate Smoothness and Flavor
Curing brings your cannabis flower to life. The smoke smooths out, the scent comes alive, and your hard work finally pays off. Here’s how to get it right:
- Once dry, move your weed buds into glass jars filled about three-quarters full.
- Store them in a cool, dark place.
- Open the jars once a day for the first couple of weeks to release excess moisture.
Curing takes 2–4 weeks for a balanced, aromatic finish, though some growers go longer for maximum smoothness.
Quick tip: If buds feel damp, leave the jar open for an hour or two before sealing it again.
Step 12: Store Your Cannabis for Long-Lasting Freshness
You’ve done the hard cannabis cultivation part. Now it’s all about keeping your buds fresh, potent, and flavorful for the long haul. Proper storage protects your weed from light, air, and moisture, all of which can degrade potency and aroma over time.
Here’s how to store your cured buds properly:
- Use airtight glass jars. Mason jars or specialized cannabis containers work best. Avoid plastic bags. They let in air and can affect taste.
- Keep it cool, dark, and dry. Ideal storage conditions are around 60–70°F (15–21°C) with humidity at 55–62%. A dark cupboard or drawer is perfect.
- Avoid opening jars too often. Each time you do, air and moisture sneak in, shortening your buds’ shelf life.
- Skip the fridge or freezer. Extreme cold can damage trichomes and make buds brittle.
Properly stored cannabis can stay fresh for six months to a year, sometimes even longer.
Quick tip: Add a humidity control pack if you live in a dry or humid climate. It helps maintain the perfect balance and keeps your buds springy, not crumbly.
From Weed Seed to Gorgeous Buds: You’ve Got This!
Learning how to grow weed at home is easy when you’ve got the right marijuana seeds, a few basic tools, and a little patience. Each step teaches you something new, from the first sprout to that perfectly cured bud.
Start small, stay consistent, and trust your plants to show you the way. Before long, you’ll be lighting up something you grew yourself — and nothing compares to that kind of satisfaction.
Troubleshooting and FAQs About Growing Weed at Home
Even the best growers run into the occasional hiccup. Don’t stress. Most problems are easy to fix once you understand what’s going on. Here are some answers to the most common questions about cannabis cultivation.
Why Are My Cannabis Leaves Turning Yellow?
Usually it’s one of three things: overwatering, nutrient imbalance, or pH drift. Check your soil — if it’s wet, let it dry out before watering again. Then test your pH (aim for 6.0–6.5 in soil). If that’s fine, give your plant a light feed with a balanced nutrient mix. (Older leaves yellowing near harvest is totally normal — your plant is redirecting energy to the buds.)
What Are the Most Common Cannabis Pests, and How Do I Get Rid of Them?
Keep an eye out for spider mites (tiny dots and webbing under leaves), aphids (small green or black insects on stems and leaf joints), and fungus gnats (little black flies hovering near damp soil. Wipe leaves gently, improve airflow, and let the topsoil dry between waterings. For light infestations, Neem oil or insecticidal soap works well.
Why Do My Buds Smell Grassy After Drying?
They likely dried too fast. Next time, lower airflow and keep humidity around 50–55% during drying. If they’re already jarred, continue curing for a few more weeks — the smell will mellow and improve.
How Do I Fix Drooping or Wilting Cannabis Plants?
Drooping usually means over- or underwatering. Check the soil: if it’s soggy, let it dry; if it’s bone dry, water slowly and evenly. Weed plants bounce back within hours once they find balance.
Why Is Mold Growing on My Buds?
Too much humidity or poor airflow. Remove affected buds immediately, increase circulation, and lower humidity to around 40–50%. Keep a small fan running during late flowering — it’s your best defense against bud rot.
How Do I Stop Nutrient Burn or Lockout?
Burned leaf tips usually mean your cannabis plants are getting too many nutrients. Flush the soil with plain, pH-balanced water, then start feeding again at half strength once the plant recovers. Keeping pH in range (6.0–6.5 in soil) also helps prevent nutrient lockout.
What Speeds up Cannabis Growth?
Stable conditions are key. Keep temperatures, light, water, and nutrients consistent, and avoid overfeeding. You can also use autoflowering or fast-flowering seeds; they reach harvest weeks sooner than regular photoperiod strains.
What Does Epsom Salt Do for Cannabis Plants?
Epsom salt adds magnesium and sulfur, two nutrients that support strong growth and vibrant leaves. Use it sparingly — about ½ teaspoon per gallon of water — only if your plants show signs of magnesium deficiency (yellowing between leaf veins).
Can You Plant Marijuana Seeds Directly in the Ground?
Yes, if your soil drains well and gets plenty of sunlight. Outdoor cannabis plants love space, but make sure the soil is rich and airy. Heavy clay or soggy soil can stunt root growth.
Does Your House Smell When Growing Cannabis at Home?
It can, especially during flowering. Keep fresh air moving with fans, and use a carbon filter or if growing indoors. Good airflow go a long way.